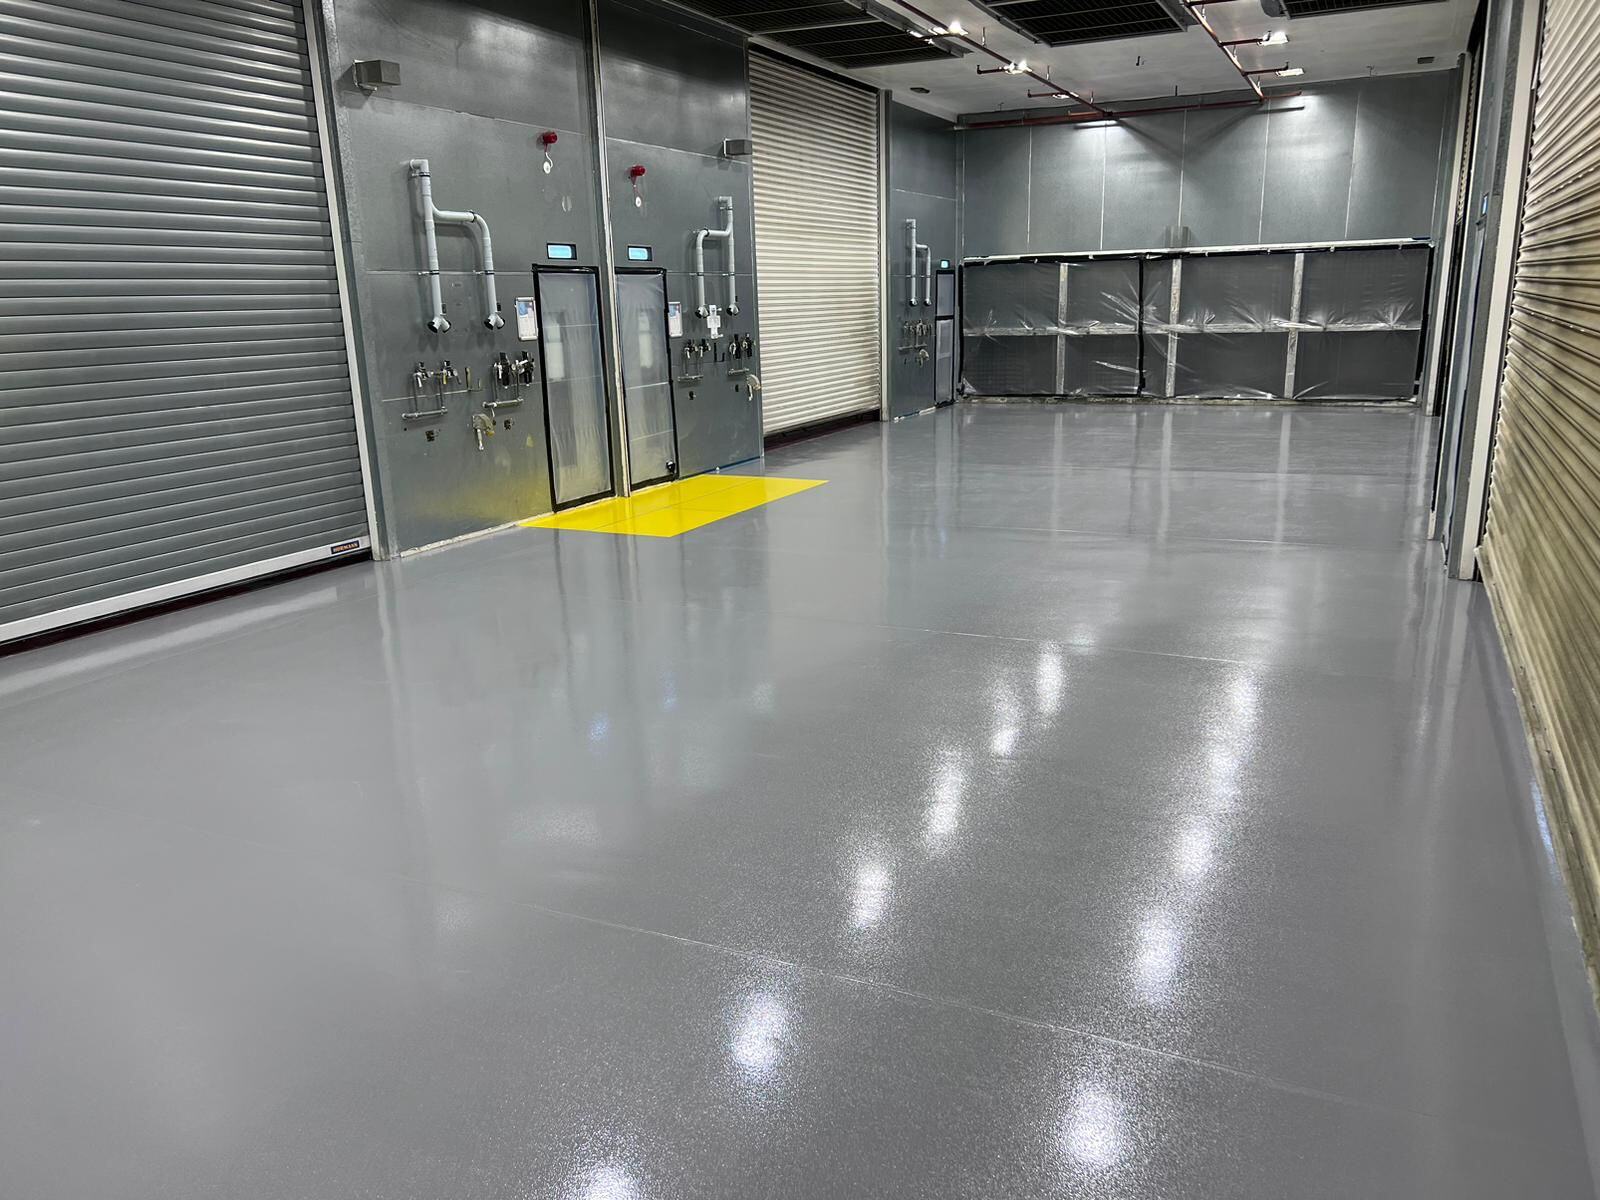
For facilities managers overseeing industrial, commercial or hygienic environments, maintaining the integrity of resin flooring is essential for safety, compliance and operational continuity. Even the toughest slip-resistant resin floors can suffer damage from heavy impact, chemical exposure or thermal shock. This is why timely and correct resin floor repair is vital to prevent minor issues from escalating into major liabilities that risk contamination and expensive downtime.

Identifying Common Types of Resin Floor Damage
Before initiating any repair, it is crucial to accurately identify the cause and type of damage to ensure the correct concrete floor repair resin and method are specified. A wrong fix can quickly lead to recurring failure.
Common types of damage requiring attention include:
- Cracking and Joint Failure: Often caused by movement in the underlying concrete substrate or poorly managed expansion joints. If the crack extends through the resin and into the concrete, structural assessment is necessary.
- Delamination: This occurs when the resin layer separates or peels away from the concrete slab. The primary causes are poor initial preparation (high moisture, surface contamination) or impact damage that breaks the bond.
- Pitting and Erosion: Found frequently in chemical processing or food areas, where strong acids or alkalis erode the resin over time. This exposes the concrete and compromises the hygienic seal.
- Surface Wear: Abrasion from constant traffic (especially wheeled traffic) wears down the protective top coat and the texture of slip-resistant resin floors, reducing their safety rating.
Phase 1: Preparation for Effective Resin Floor Repair
The success of any epoxy resin floor repair relies almost entirely on meticulous preparation of the damaged area. Without proper preparation, the new concrete floor repair resin will fail to bond correctly.
- Stop the Cause: First, address the source of the damage (e.g., stopping a leaking pipe, limiting heavy vehicle traffic). Repairing the floor without fixing the underlying issue guarantees the damage will reappear.
- Clean and Define: Clearly mark the area to be repaired. Use specialist degreasers to remove all contaminants (oil, grease, food residue). The area must be bone dry before any application begins.
- Mechanical Preparation: The existing failed resin must be removed back to a sound edge, and the exposed concrete must be mechanically prepared. Methods like grinding or light chipping are used to create a clean, porous, 'keyed' surface profile that allows the concrete floor repair resin to achieve maximum adhesion.
Phase 2: Specifying the Correct Epoxy Resin Floor Repair Solution
Choosing the right repair material is crucial. It must not only match the existing resin system but also meet the performance demands of the environment (e.g., chemical resistance, food safety).
- Matching Systems: Ideally, the epoxy resin floor repair material should chemically match the existing floor (e.g., use a polyurethane repair compound on a polyurethane floor). This ensures uniform thermal expansion and contraction, preventing future stress cracks along the repair joint.
- Performance Requirements: In wet areas, the repair compound must incorporate aggregates to restore the necessary texture for slip resistant resin floors. For heavy processing zones, a high-strength, heavy-duty screed should be used.
- Fast-Cure Options: To minimise downtime, especially in 24/7 operations, specify fast-curing materials like MMA (Methyl Methacrylate) or specialist rapid-cure polyurethanes. These allow the area to be returned to service in a matter of hours, making them ideal for urgent resin floor repair.
Phase 3: Application and Curing Best Practices
During the application, strict adherence to manufacturer guidelines regarding mixing, temperature and curing times is necessary to ensure the concrete floor repair resin achieves its full strength.
- Primer Application: Always apply a suitable primer to the prepared concrete substrate. This seals the concrete and enhances the bond between the old floor and the new epoxy resin floor repair compound.
- Mixing Accuracy: Resin systems are exact. Ensure the hardener and resin components are measured and mixed precisely according to the manufacturer’s instructions. Incorrect mixing is a frequent cause of repair failure.
- Curing Management: Do not allow foot or wheeled traffic onto the repaired area until the material has fully cured as per the specification. Premature use is a sure way to damage the repair and necessitate further resin floor repair.
Maintaining slip-resistant resin floors through professional and timely repairs is a core function of facilities management. By correctly identifying damage, meticulously preparing the substrate and specifying the appropriate concrete floor repair resin, you protect your capital investment and maintain regulatory compliance. Addressing issues quickly with expert knowledge and the right epoxy resin floor repair kit is always more cost-effective than delaying until a full replacement is required.
Expert Solutions for Your Facility
To find out more about how to manage and execute reliable resin floor repair in your facility, get in touch with a member of our team here at Central Flooring Services. Contact us today for specialist guidance on repair specifications and to schedule an urgent damage assessment by one of our certified technicians.

Image Source: Envato
The Top 4 Benefits Of Resin Floor Demarcation For Industrial Facilities
Why Chemical Resistant Flooring Is Essential for Food Industries